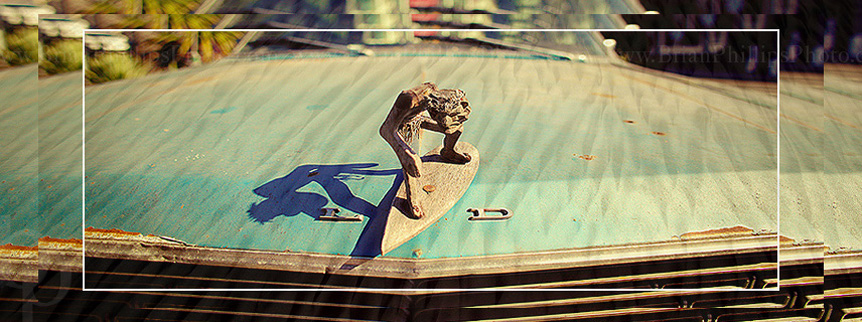
I wanted to show some basic but a creative use of Adobe Photoshop to make a fun picture, into a cool looking piece of art. And what I think a lot of novice and amateur photographers don’t realize is that basic knowledge of photoshop can really help transform what looks like a plain jane photo into a contrasty, colorful, and super fun shot. Below is the finished piece that is going to find its place on someones wall, well hopefully :-).


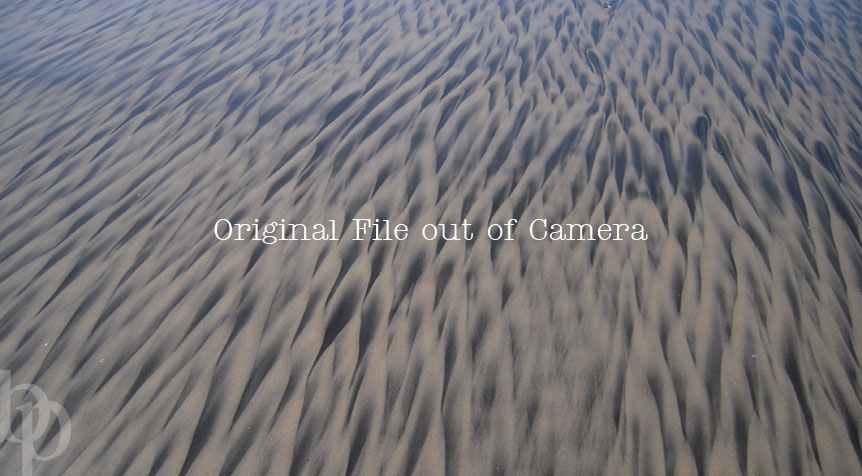
So I started with two photos, a wooden Surfer hood ornament on an old Ford station wagon I recently shot in Manhattan Beach, CA. And another shot of the sand I took at a beach in San Diego, CA. The finished product was blended together but I will get to that shortly.
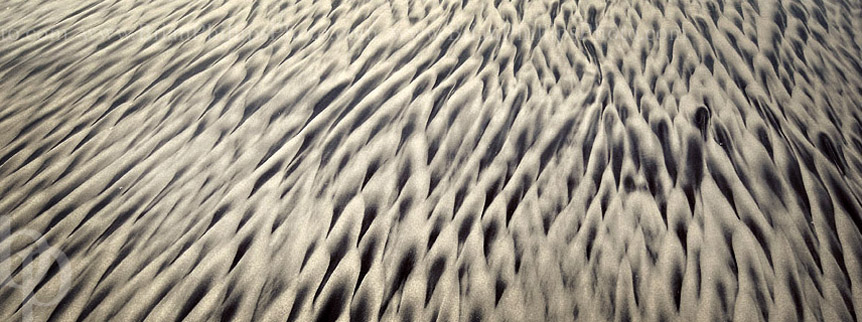
The first step was to remove most of the color from the Sand shot by Desaturing by about 70%. This helped to even out the color. I then pumped up the contast enough where I still had detail in the lighter parts of the sand. Next I used a Kubota Image Tool action to easily add a yellow antique tone to the shot.


The next step was to tone the Surfer photo. I spent a lot of time messing around with contrast adjustment and color tones until I found what suited my liking. You will see a slightly cross-processed look (see blue in the shadow area) and a nice warm yellow tone to remind me of the bright California sun.


I then cropped the Surfer photo into a more rectangular size and I did not hesitate to squash the photo top down a bit. I preferred a more rectangular shape, and this was the only way to still keep part of the grill, the glass windscreen, and part of the blurry palm tree on the upper left in view.


Once I had my Surfer photo toned, cropped and colored to my liking, I simply duplicated the layer. I then resized this new layer so it would be smaller than the first. I then repeated this step, making the third photo even smaller than the first two. Next, a 2 pt. white border was added around the smallest layer.


Next I came back to the Sand photo. I thought that if I layered this shot over the Surfer and then adjusted the opacity of the sand so that it would only show about 20%, that the effect would be as if the Surfer was riding the waves, DUDE.


And here is the Finished Product. I think either shot would stand alone nicely on their own. But when you have a little free time, playing around with Photoshop can be a nice stress reliever and you can be as creative as you want.


Interested in learning more about using Photoshop? I am here to help. From the basics to more complex needs. I have used Photoshop since it nearly debuted back in early 90’s. I have helped numerous photographers especially learn and use photoshop for their wedding work and album design. While it can take years of learning the ins and outs of PS, the knowledge of shortcuts and the understanding you can push the limits of each image are key. So reach out and connect with me if you would like an hour tutorial, or something more intense. Just simply contact me at Brian@BrianPhillipsPhoto.com.

.jpg)
by admin